Candle Wax Wood Counter Finish (with Stain And Beeswax Finished Supports)
Hiya folks!
So if you haven't read my previous WIP posts ( Making a Quarter Corner Floating Standing Desk from Reclaimed Wooden Cable Reel & DIY Reclaimed Wooden Cable Reel Semicircle Floating Table) this is just a follow up post about how they were finished!..
 |
| Completed Reclaimed Wood Floating Standing Tables |
Once all the pieces had been fully sanded and I was confident that everything fit and was strong enough for (hopefully) a lifetime of use, I could get down to applying a wood finish before the final installation.
Final Finish for Table Tops.
For the cable reel table tops, I really wanted to maintain as much of the original raw reclaimed wood light colour. If I could I would have left them without any finish but I knew they would need to be protected.
After some research, the consensus seemed to be a polyurethane clear finish that is best applied via an expensive spray system and that I could only find 4 liter tins of locally!!
Nope, that wasn't going to do.... I had had some experience with making a paraffin wax finish for sculptures in the past which still looked great and hadn't yellowed at all ( unlike the yellowing that eventually happens with a beeswax finish) and with a little research I found that a paraffin wax finish was not unheard of for wood. Though probably not the best protection, it would do for what I needed the tables for.
All the info I found online about paraffin wax wood application was either using an already prepared bought wax finish or melting candle wax on wood with a heating mechanism like a blow torch though (which I didn't have).
I decided to use the recipe I usually made (just heated turp+white paraffin candle wax) as it would be easy to make and apply, plus would just cost pennies! (or rather a few ringgit).. :) With a little testing, I found that after the turpentine had completely evaporated the colour of the wood was very close to the original raw wood hue, with a smoother satin finish. I loved it!!..
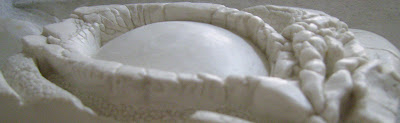
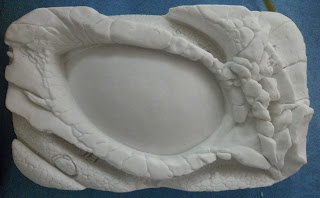
 |
| How they looked originally, mostly unsanded and newly sawn to the pieces needed for the tables. |
Materials:
- White Paraffin Candles
- Turpentine
- Double Boiler
- Portable Stove
- Brush (I used a 3" one)
- Old Clean Rag
- Gloves (best to use these when buffing with the rag as turpentine can absorb through skin).
- Face Mask (I didn't have one, but I made sure to do this outside in a very well ventilated area)
Preparing the Wax and Application.
 |
| Melting the Paraffin candle wax about 50/50 with turpentine in a double boiler. |
The whole process was done outside to dissipate the turpentine fumes as much as possible during application.
Once the wax had melted and was relatively hot I quickly brushed it on the wood in small segments (about a plank at a time) before buffing off the excess quickly with a rag. I didn't bother too much with extra wax left in the deep grooves at this point as this would be removed later with a small screwdriver and rag.
 |
| Quickly buffing off the excess wax. |
 |
| This pic was taken right after I had finished applying the wax. I expected the colour to lighten as the turpentine evaporated. p.s. It didn't really lighten much more after this as it turns out. Perhaps because the finish was applied in a thicker layer that the test or because of the different turpentine I used. ( Artist's grade turps was used in the test and just a diy store turps here) |
After the wax had been applied to all table tops, I went over them once again with a cloth, buffing the surface and removing extra wax that had been caught in the grooves. I was careful not to buff too much as I wanted to maintain just a nice satin finish to the wood.
These were left to dry for a few days till the turpentine smell had dissipated before the final installation.
Table Brackets and Frames Final Finish
For the supporting pieces of wood I just so happened to have a leftover selection of finishes to choose from - a good tinted alkyd varnish, an IKEA Varda outdoor stain and an IKEA Behandla wax finish.
The varnish would have been great but after much deliberation and research I decided on staining all the supporting wood with the Varda then give them a beautiful sheen with the Behandla wax finish. It would be just so much easier to apply and I felt would give all the protection needed. The dark finish of the supports would contrast beautifully with the light table tops as well!
 |
| I had almost decided to go with the varnish and had made these nail stands (that the bracket pieces are balanced on) for the job. Luckily the nail stands still proved useful for the staining and waxing. :) |
Staining alone would have resulted in a rather dry, matt, rougher look to the wood than I wanted. However applying the Behandla beeswax finish over the stain gave the perfect conditioned satin finish I was looking for and the whole proses was super easy.
 |
| Behandla and Varda Wood Finishes |
 |
| Applying the Behandla Wax finish with a brush. This was left on for 15 mins then the excess wiped off. |
 |
| All pieces stained and waxed. The stain on the plywood base was left a lot longer before buffing off to get a darker stain that matched the other wood. |
 |
| How it looked after the stain and wax finish had dried. |
With that done, all that was needed was patience as I waited for everything to dry fully (about 24 hours for the Behandla) and the turpentine smell of the table tops to disappear ( a few days) before installing the tables in my studio!..
You can check out the full WIP's of these tables at:
&
Thanks for dropping by!.. :)


I love wood, I always try to take care of its proper protection.
ReplyDeleteCompletely worth the extra effort for solid wood items!.. I concur :)
Delete