Mince Pies 2 & 3 Watercolour Process
Did these two a while back as accompanying pieces to my first Mince Pies Watercolour.. This time round I was sure to document the process as best I could.. :)
 |
| 'Mince Pies 2' Artists Watercolour on Archival Rough Heavyweight 300 gsm 100% cotton rag Archers Watercolour Paper. Size: 5 x 7 Inches |
 |
| 'Mince Pies 3' Artists Watercolour on Archival Rough Heavyweight 300 gsm 100% cotton rag Archers Watercolour Paper. Size: 5 x 7 Inches |
First a peek at my set up..
These were done on Rough Heavyweight 300 gsm, 100% cotton rag Archers Watercolour Paper
( one of the very best types of archival watercolour papers there is !... ), thus because of its thickness no stretching was required, and I just attached the paper to a hardboard with masking tape.
You can't see in these pics but two large glass jars with clean water were placed next to the palette (to the right, since I'm right handed) as well as a paper towel to tamp or slightly brush my brushes over, to get just the right amount of water on the brush as I painted.
 |
| Pure & premixed pigments are kept in covered small containers so no dust gets in to them between painting sessions. |
Predrawing
The preliminary drawings was done with graphite pencil, just dark enough so that the lines would not be lost too quickly in the subsequent washes..
Starting the Washes
After applying a little masking fluid for the white highlights of the sugar...
1st Layer - W&N New Gamboge (yellow)
2nd Layer - W&N Light Red
3rd Layer - W&N Intense (Phthalo) Blue + Permanent Rose
Besides laying each layer 'only' once each layer is bone dry, another tip for ensuring vibrant watercolours that I read somewhere (can't remember where) is to lay a clean wash of water first, leave to soak in, and only then lay the watercolour layer one top. As far as I remember, this was suppose to draw the paint deeper into the paper, thus ensuring even less intermingling with subsequent layers of paint. This also of course means having to wait a lot longer for each layer to dry completely.
 |
| 6th Layer |
 |
| 6th Layer |
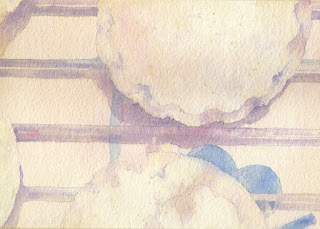
French Ultramarine Blue was used for the table design (5th Layer)
and then during the 6th layer another layer of W&N Intense (Phthalo) Blue + Permanent Rose (a slightly more reddish purple mixture than the last) was applied.
A thin layer of Raw Umber, then a very thin Ultramarine, finished off with a touch of Alizarin + Ultramarine to start off the yummy pie filling (below).
I try my best to keep everything loose!..
 |
| 8th Layer |
 |
| 8th Layer |
Softened the edges with a wash of clean water all over (used a small brush to scrub at hard edges that I had missed previously), then when still slightly damp the shadows were touched up here and there with Alizarin Crimson & New Gamboge (Yellow). The table top was then strengthened in hue in some parts of the table with New Gamboge (Yellow) and a touch of Alizarin Crimson. A little more detailing of the blue pattern print was done (Ultramarine). A touch here and there of Intense (Phthalo) Blue was also used for the steel rack. Finally the shadows were darkened even more with a strong mixture of Intense (Phthalo) Blue + Permanent Rose.
 |
| 12th Layer |
 |
| 12th Layer |
Next I'll be doing the finishing touches of deepening the red mince jam and bringing the darkest darks of the iron cooling tray and shadows! The yellows aren't quite as yellow as they look here (below) but I'll be subduing them a bit too....
The masking fluid for the sugar was removed and the edges softened..
 |
| Last few Layers |
 |
| Last few Layers |
In the final stages, some ultramarine washes in the darks and raw umber here and there, all over, was applied. Even more strong Alizarin Crimson for the jammy parts (with a layer of ultramarine in between) and slightly in other parts of the piece helped to create depth in the jam and unify the piece even more.
 |
| Mince Pies 2 Complete |
 |
| Mince Pies 3 Complete |
And that was it!... Just love pulling off the masking tape when a piece is complete, to reveal the neat sides and see the whole piece with the gorgeous serrated edged border!! (see how the pieces look with the border in the very first images above!)
Thanks for dropping by guys!..


Comments
Post a Comment