'Duality of Mind' Pastel and Colour Pencil WIP
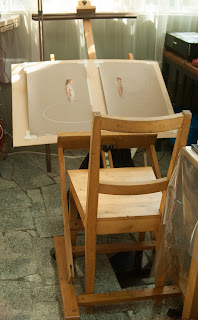 |
| 'Duality of Mind' in Progress on the Easel. |
This is quite a minimalist drawing using soft pastels ( a medium I hadn't used in the past decade before this!).
The composition was carefully constructed beforehand as it was to be The Most important and visible element in the piece ( even more than usual ) due to the minimalist design.
Canson Mi-Teintes (160g/m) was used, which is supposed to have the highest cotton content on the market (over 50%). It is popular among pastelists but it seems sanded paper is also a fav and better at holding more pastel layers. I really like the lovely Canson Mi-Teintes papers texture though and since most of the paper was going to be left untouched I decided I would sand just the parts that I would be drawing/painting with the soft pastel. I don't know if this is something that pastelists ever do but I did a few tests and it seemed to work well.
 |
| I lightly traced the outline of the figure before sanding the parts that would be 'painted' quite thickly with soft pastel. |
The 65x50cm Canson Mi-Teintes sheet was divided into two for the concept of the piece. Most of the paper was to be left untouched and any reworking would have been noticeable, so my predrawing was traced on rather than drawn straight and then clarified with white chalk & charcoal pencil after sanding. This resulted in a soft sanded edge around the figures which I feel adds to the concept and feeling of the piece.
 |
| Here I had already clarified the traced lines with white chalk & charcoal pencil after sanding the areas that would have thick soft pastel. |
As it had been so long since I'd done a drawing in pastel, I wasn't quite familiar with the process and what to expect (how spraying fixative would effect the drawing (would it darken it ? make it difficult to lay subsequent layers if done too many times?), and how the layering of subsequent layers would be (I heard the build up of the pastel itself starts to inhibit too much layering).. Though I was going for a highly multilayered look I also wanted translucency to the skin and keeping in mind that too much layering might not be an option, I was careful to get the hues right with as little pigment as possible the first time and be receptive to the process (in other words not overworking it!!)
Below is the palette used (except for 2 soft pastels I forgot to include in the picture - light fuchia & olive green)
 |
| Hues used. Luna Aquarell Staedtler colour pencils, Mungyo Soft Pastels, White Chalk Pencil & Charcoal Pencil. |
Beginning the soft pastel....
 |
| Using soft pastel, the colours were carefully placed, layering colours to get the right hue.. |
 |
| The soft pastel was then carefully blended while adding more pastel where needed. |
I tried to work on both figures at the same time as much as possible, keeping them at the same level of completion so that they stayed in harmony with each other as well as helping me make compositional and colour decisions for the whole piece as things moved along.
(This piece was unfortunately interrupted for several months due to an unavoidable sad family event so I was not quite able to keep the ideal flow, but I think I managed to keep the piece harmonious non the less in the end)
After laying a soft pastel base on the left figure (above) I started on the right figure at this point, however I begun with drawing in the details more clearly this time with colour pencil first.
 |
| Decided to draw in the details clearly with colour pencil before going in with the soft pastel for the right figure. |
Then more colour pencil detailing on the left figure.
 |
| Then like the left figure, the soft pastel was applied and then blended for the right figure. |
Things started look a little more put together when I started in with the detailing for the right figure.
 |
| Detailing being done with colour pencil in concert with soft pastel where need be |
 |
| The right figure mostly done. |
After clarifying the front two white ovals a bit more with white chalk pencil the right panel was given a layer of fixative and another layer of soft pastel was applied to the dark gray circle..
I was quite pleased that the fixative (I used Krylon Archival Workable Fixative) didn't seem to effect the tone of the pastel at all and it looked, to my eye, just the same after!!
Now it was time to bring the figure on the left up to a higher finish.
 |
| Another layer of unfixed soft pastel was applied. |
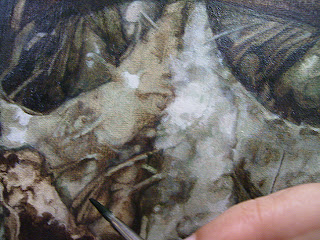
After the soft pastel was laid (above) I went in with more detailing with colour pencil and white chalk pencil again (white colour pencil was not used as it was too hard to make any marks on the soft pastel surface), trying to get in some interesting hatching and lines..
Since it had been so long since I'd worked on this piece, careful attention was made to harmonise how I blended and used my strokes with the other figure.
 |
| Completed left figure (notice the arrows fade off into the distance) |
At points I used the pad of my finger to dab parts to remove just the slightest layer of pigment that sort of harmonized the drawing with the background... A putty eraser was also used to create smudgy edges (enhanced the mood of the piece) and create depth by making objects move back into the distance (example the arrows had been darker and more stark before I rubbed them back).
After the left figure was basically done I gave it a light spray of fixative before continuing with a little more detailing on both sides (the fixative tended to make the pastel ever so slightly more grainy I noticed, so I used the back of my nail to delicately slightly smoothen the surface which also improved the saturation of the hues.)
Here it is done, on the easel, after a light spray of fixative on both...!!
 |
| Duality of Mind completed on the easel. |
And that was it!!.. I am pretty pleased with the results and am glad to have been able work on a piece much larger than I have been creating for the past few years.
More info on the concept and close up images of the completed work can be found at
 |
| More accurate colour corrected scanned image of 'Duality of Mind' Size: Each paper panel is 19.1 x 12.4 Inches (without borders) (Both paper panels including borders for framing is 25.6 x 19.7 Inches) Purchase at 'Duality of Mind' |
Thanks for dropping by guys!





Comments
Post a Comment